kubernetes 通过 helm 部署 apisix 网关
一、apisix 介绍
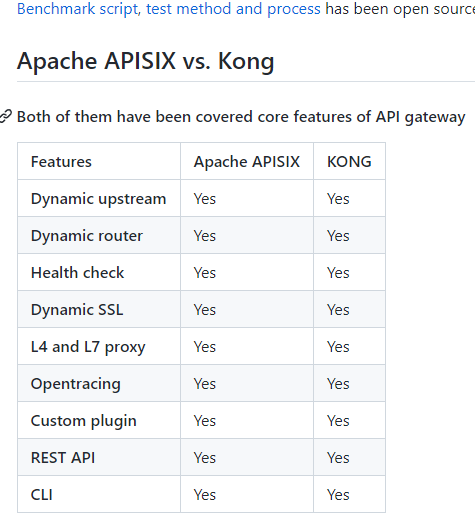
APISIX 是一个云原生、高性能、可扩展的微服务 API 开源网关,基于 OpenResty(Nginx+Lua)和 etcd 来实现,对比传统的 API 网关,具有动态路由和热插件加载的特点。系统本身自带前端,可以手动配置路由、负载均衡、限速限流、熔断、金丝雀发布、身份验证、可监控等插件,操作方便。可以使用 Apache APISIX 来处理传统的南北流量,以及服务之间的东西流量。它也可以用作 k8s 入口控制器,APISIX 是用 Lua 语言开发,语言相对简单,容易上手,同时可以按自己的需求进行系统的二次开发以及开发自己的插件。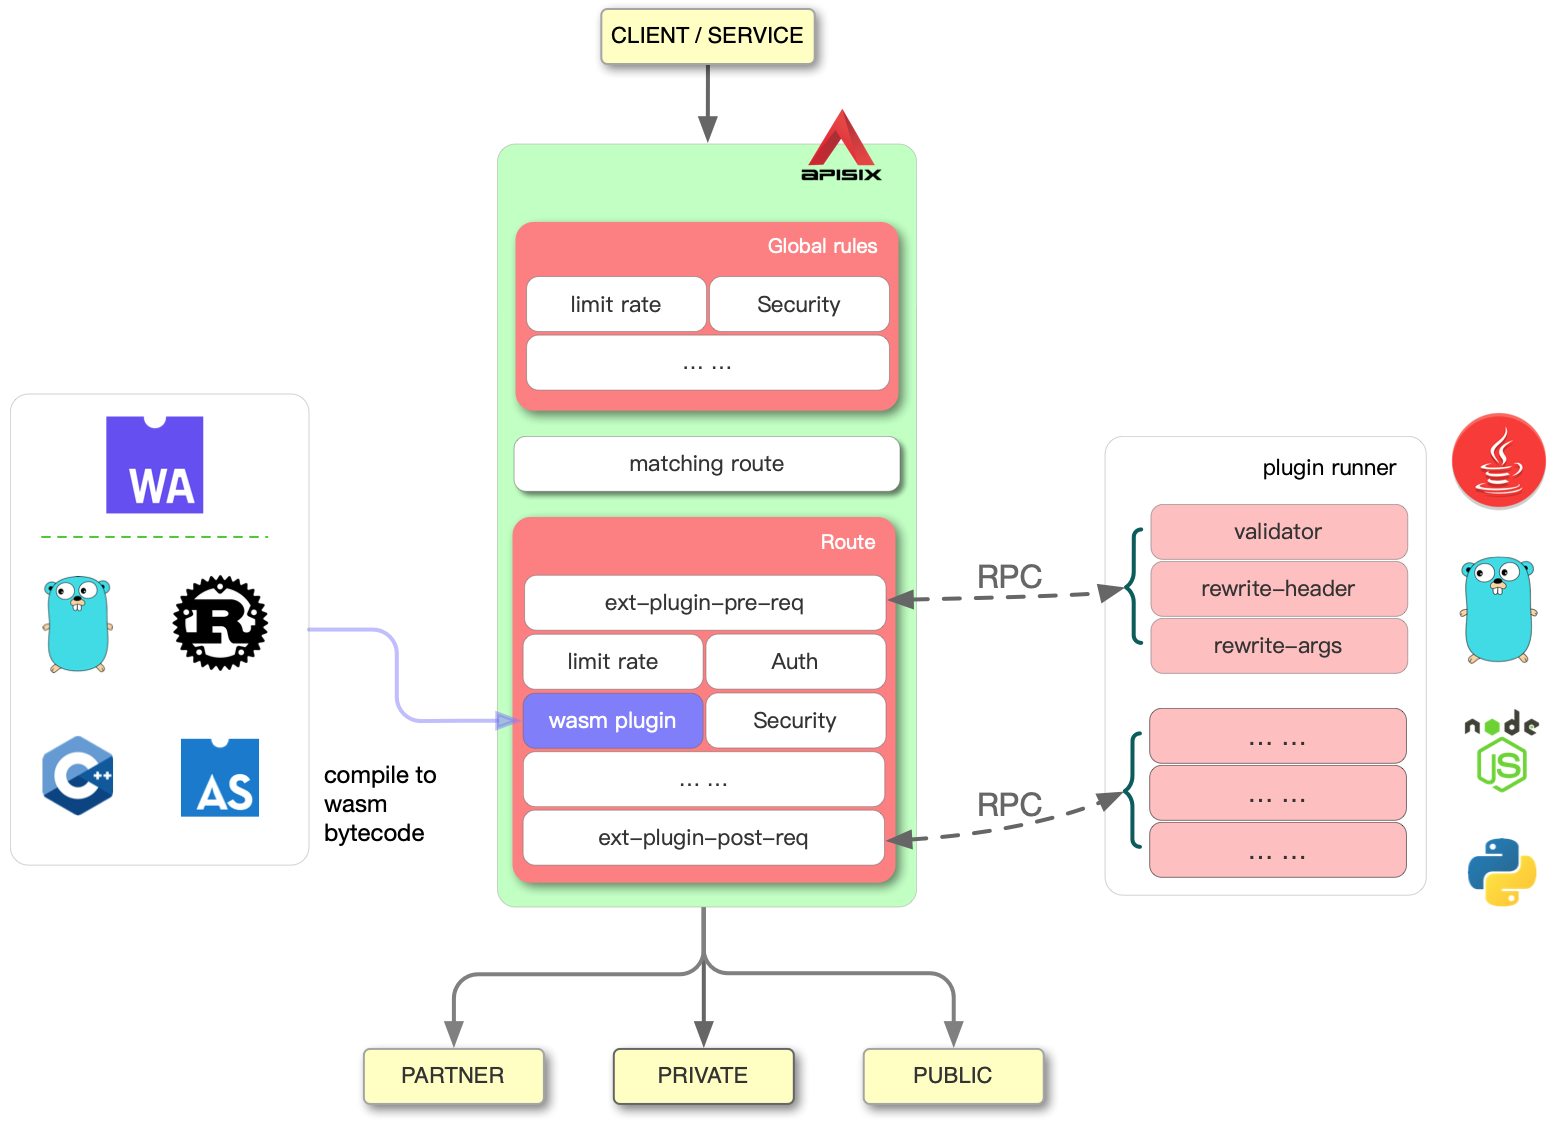

二、kubernetes 通过 helm 部署 apisix 网关
APISIX 相关组件(Apache APISIX、Apache APISIX Dashboard、Apache APISIX Ingress Controller)
APISIX 中三种方式可以注册边缘路由,dashboard、ingress-controller、admin api。
1.添加 helm 仓库
helm repo add apisix https://charts.apiseven.com
helm repo add bitnami https://charts.bitnami.com/bitnami
helm repo update
2.部署 Apache-Apisix
可以分开单独安装
helm install apisix apisix/apisix --set gateway.type=NodePort \
--set ingress-controller.enabled=true \
--set dashboard.enabled=true \
--set ingress-controller.config.kubernetes.ingressVersion=extensions/v1beta1 \
--set gateway.tls.enabled=true \
--set etcd.volumePermissions.enabled=true \
--set etcd.persistence.storageClass="alicloud-nas-subpath" \
--set etcd.persistence.size="10Gi" \
--set ingress-controller.config.apisix.serviceNamespace=apisix  --namespace apisix --create-namespace
创建了五个服务资源。
- apisix-gateway,处理真实流量,暴露apisix服务;
- apisix-admin,它充当控制平面来处理所有配置更,主要用于通过api的方式将路有写入etcd。
- apisix-ingress-controller,监听k8s的api 后通过apisix-admin 写入etcd。
- apisix-etcd 以及 apisix-etcd-headless 用于 etcd 服务和内部通信。
- apisix-dashboard:Apache APISIX 前端界面
配置 ingress 访问 dashboard
apiVersion: extensions/v1beta1
kind: Ingress
metadata:
  name: apisix-dashboard
  namespace: apisix
spec:
  rules:
  - host: apisix.idcsec.com
    http:
      paths:
      - backend:
          serviceName: apisix-dashboard
          servicePort: 80
        path: /
我们使用 kennethreitz/httpbin 作为服务镜像
尝试将其部署到Kubernetes 集群:
kubectl run httpbin --image kennethreitz/httpbin --port 80
kubectl expose pod httpbin --port 80
创建一个 Ingress 资源
这里配置 ingress,apisix-ingress-controller 会将规则同步到 apisix,ingress 和 ApisixRoute 配置一个即可。

# httpbin-ingress.yaml
# Note use apiVersion is networking.k8s.io/v1, so please make sure your
# Kubernetes cluster version is v1.19.0 or higher.
apiVersion: networking.k8s.io/v1
kind: Ingress
metadata:
  name: httpserver-ingress
spec:
  # apisix-ingress-controller is only interested in Ingress
  # resources with the matched ingressClass name, in our case,
  # it's apisix.
  ingressClassName: apisix
  rules:
  - host: local.httpbin.org
    http:
      paths:
      - backend:
          service:
            name: httpbin
            port:
              number: 80
        path: /
        pathType: Prefix

# Use ingress.networking.k8s.io/v1beta1 if your Kubernetes cluster
# version is older than v1.19.0.
apiVersion: networking.k8s.io/v1beta1
kind: Ingress
metadata:
  name: httpserver-ingress
  # Note for ingress.networking.k8s.io/v1beta1,
  # you have to carry annotation kubernetes.io/ingress.class,
  # and its value must be matched with the one configured in
  # apisix-ingress-controller, in our case, it's apisix.
  annotations:
    kubernetes.io/ingress.class: apisix
spec:
  rules:
    - host: local.httpbin.org
      http:
        paths:
          - backend:
              serviceName: httpbin
              servicePort: 80
            path: /
            pathType: Prefix
创建一个 ApisixRoute 资源:
apiVersion: apisix.apache.org/v2beta1
kind: ApisixRoute
metadata:
  name: httpserver-route
spec:
  http:
    - name: httpbin
      match:
        hosts:
          - local.httpbin.org
        paths:
          - "/*"
      backend:
        serviceName: httpbin
        servicePort: 80
测试
检查routes创建成功
kubectl exec -it -n ${namespace of Apache APISIX} ${Pod name of Apache APISIX} -- curl http://127.0.0.1:9180/apisix/admin/routes -H 'X-API-Key: edd1c9f034335f136f87ad84b625c8f1'并请求 Apache APISIX 验证路由。
kubectl exec -it -n ${namespace of Apache APISIX} ${Pod name of Apache APISIX} -- curl http://127.0.0.1:9080/headers -H 'Host: local.httpbin.org'查看 apisix-admin 接口 apikey:
export POD_NAME=$(kubectl get pods --namespace apisix -l "app.kubernetes.io/instance=apisix,app.kubernetes.io/name=apisix" -o jsonpath="{.items[0].metadata.name}")
kubectl -n apisix exec -it $POD_NAME cat conf/config.yaml |grep key
通过apisix-dashboard创建httpbin暴露外网
- 不能同时使用 ,需要吧之前创建httpbin ingres删除在创建(或者dashboard作为只查看)
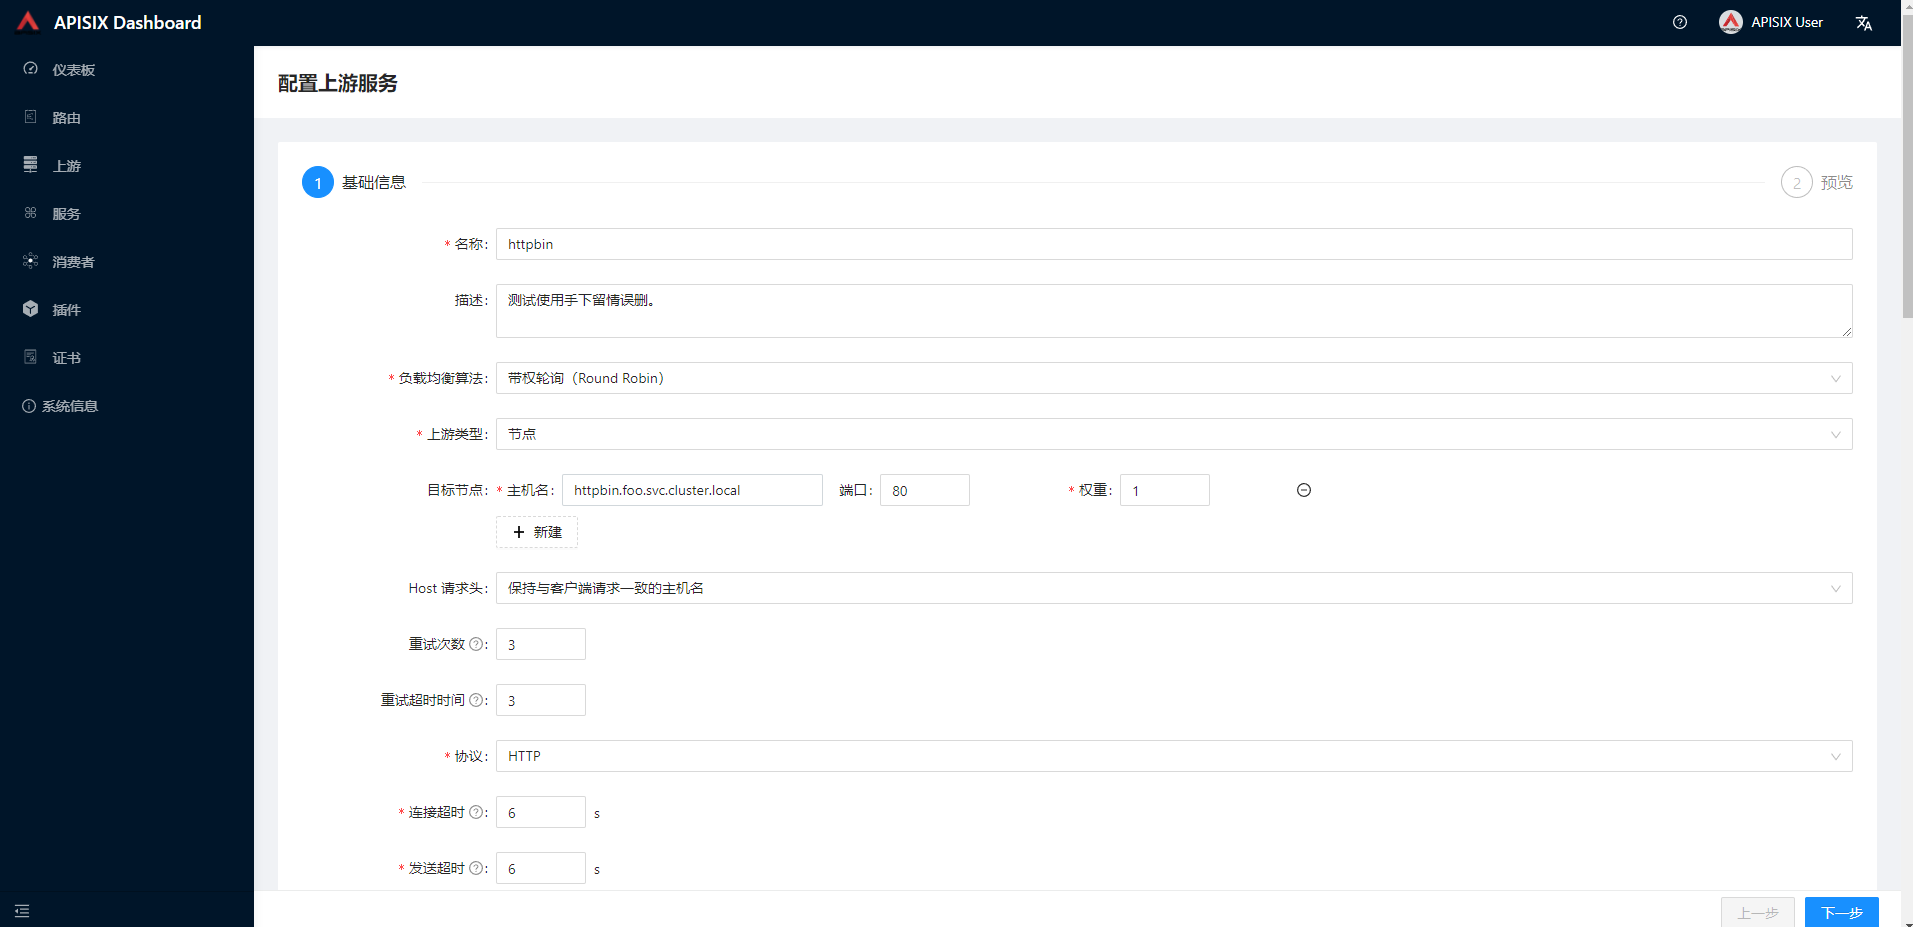
上游
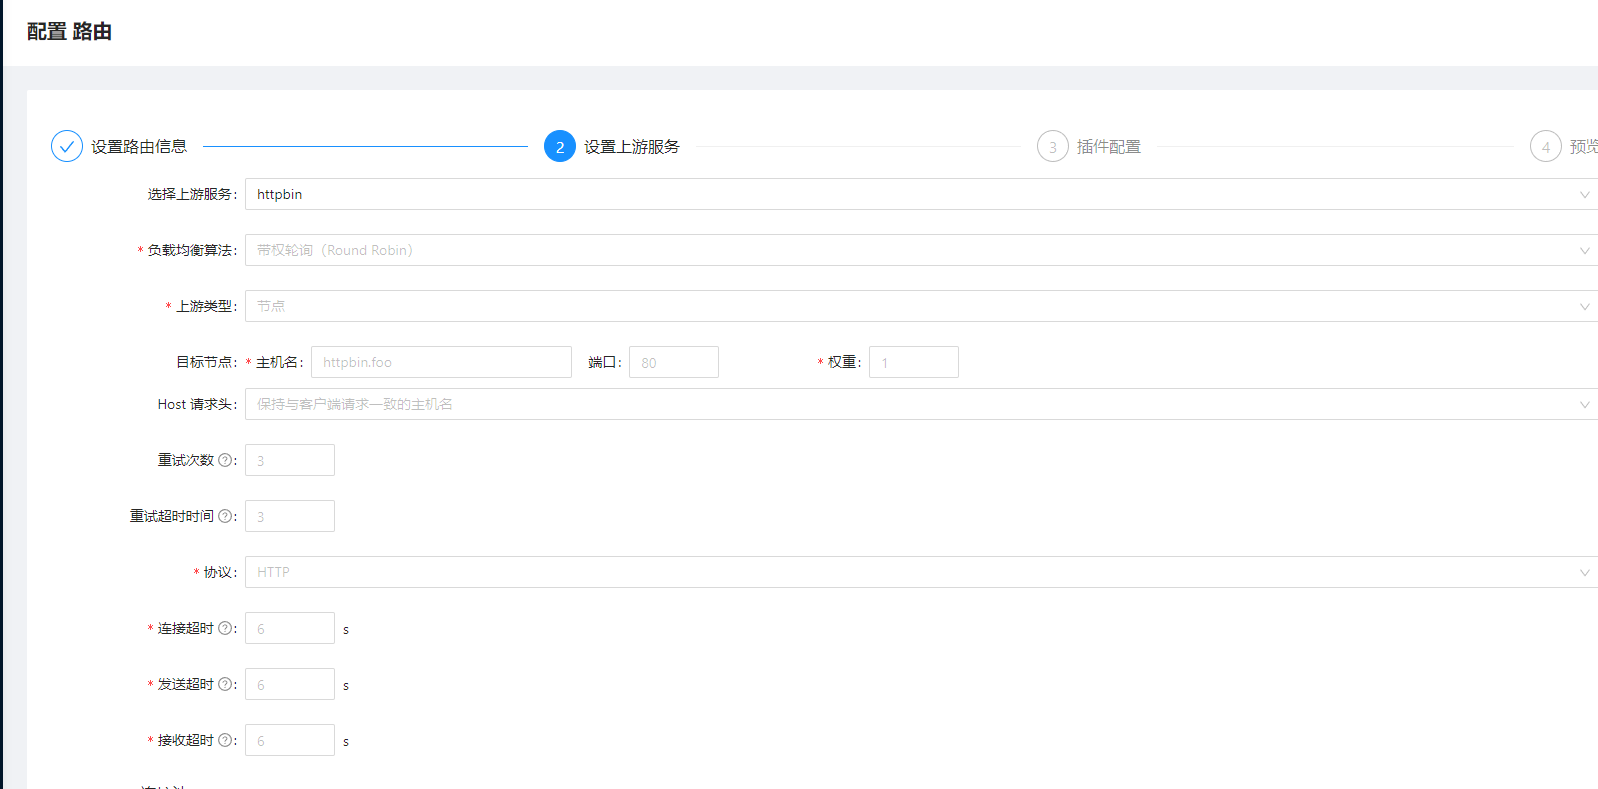
上游列表包含了已创建的上游服务(即后端服务),可以对上游服务的多个目标节点进行负载均衡和健康检查,这里使用httpbin务配置一个上游

服务
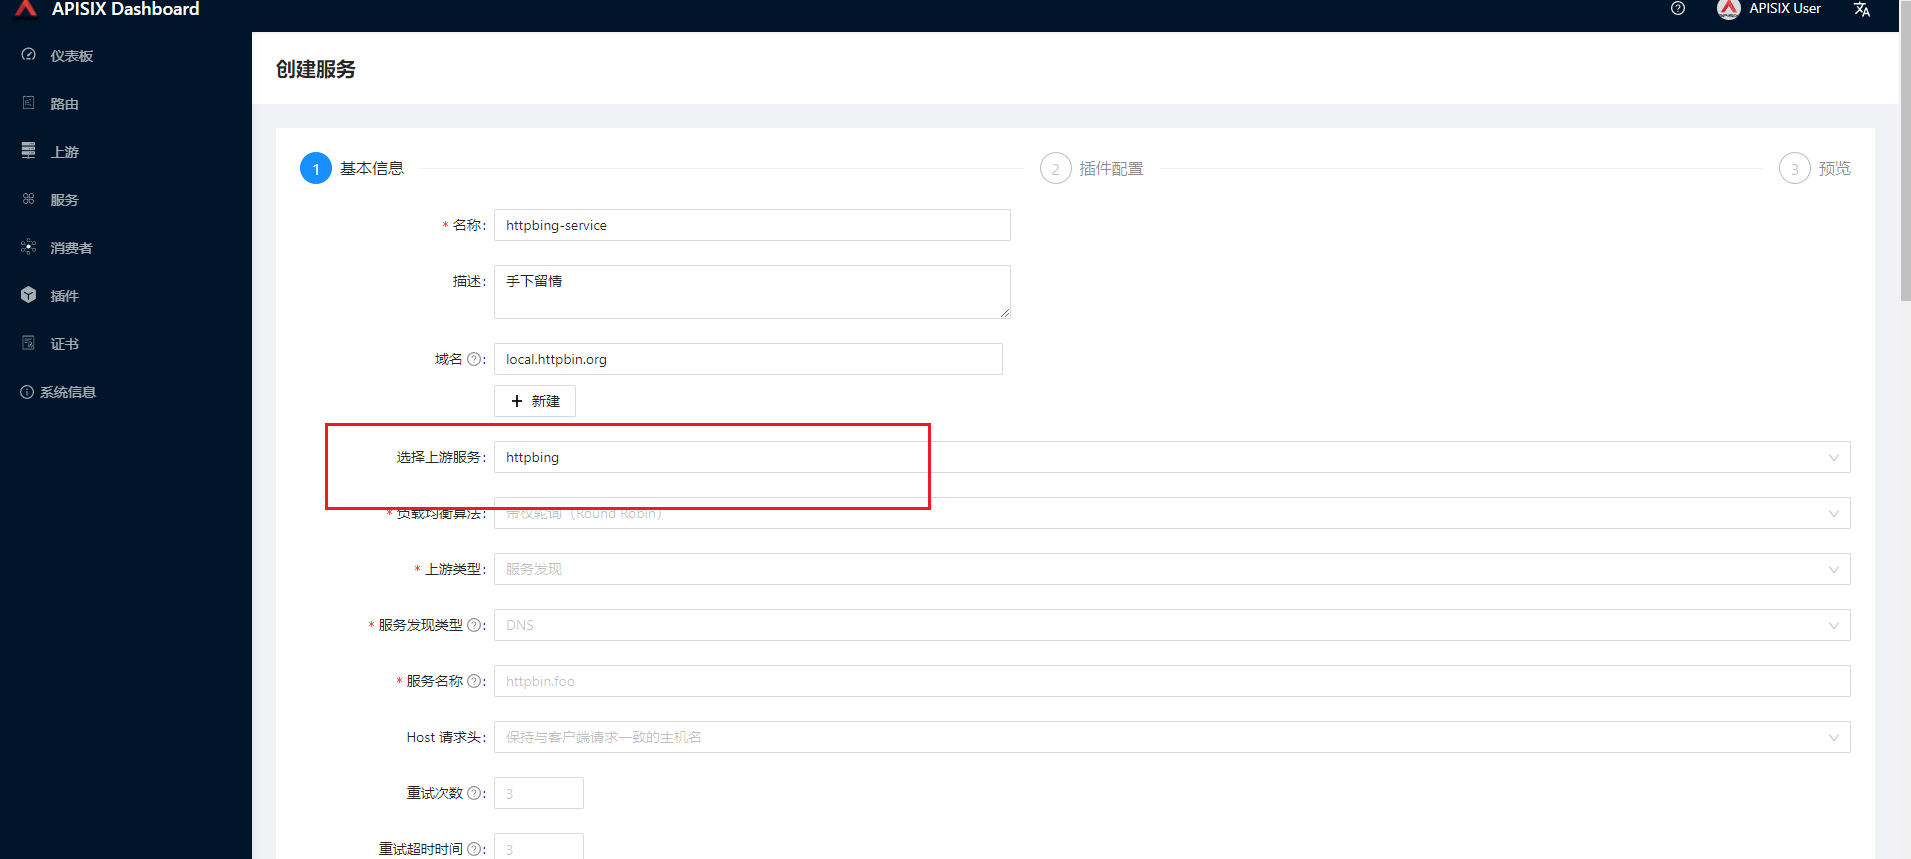
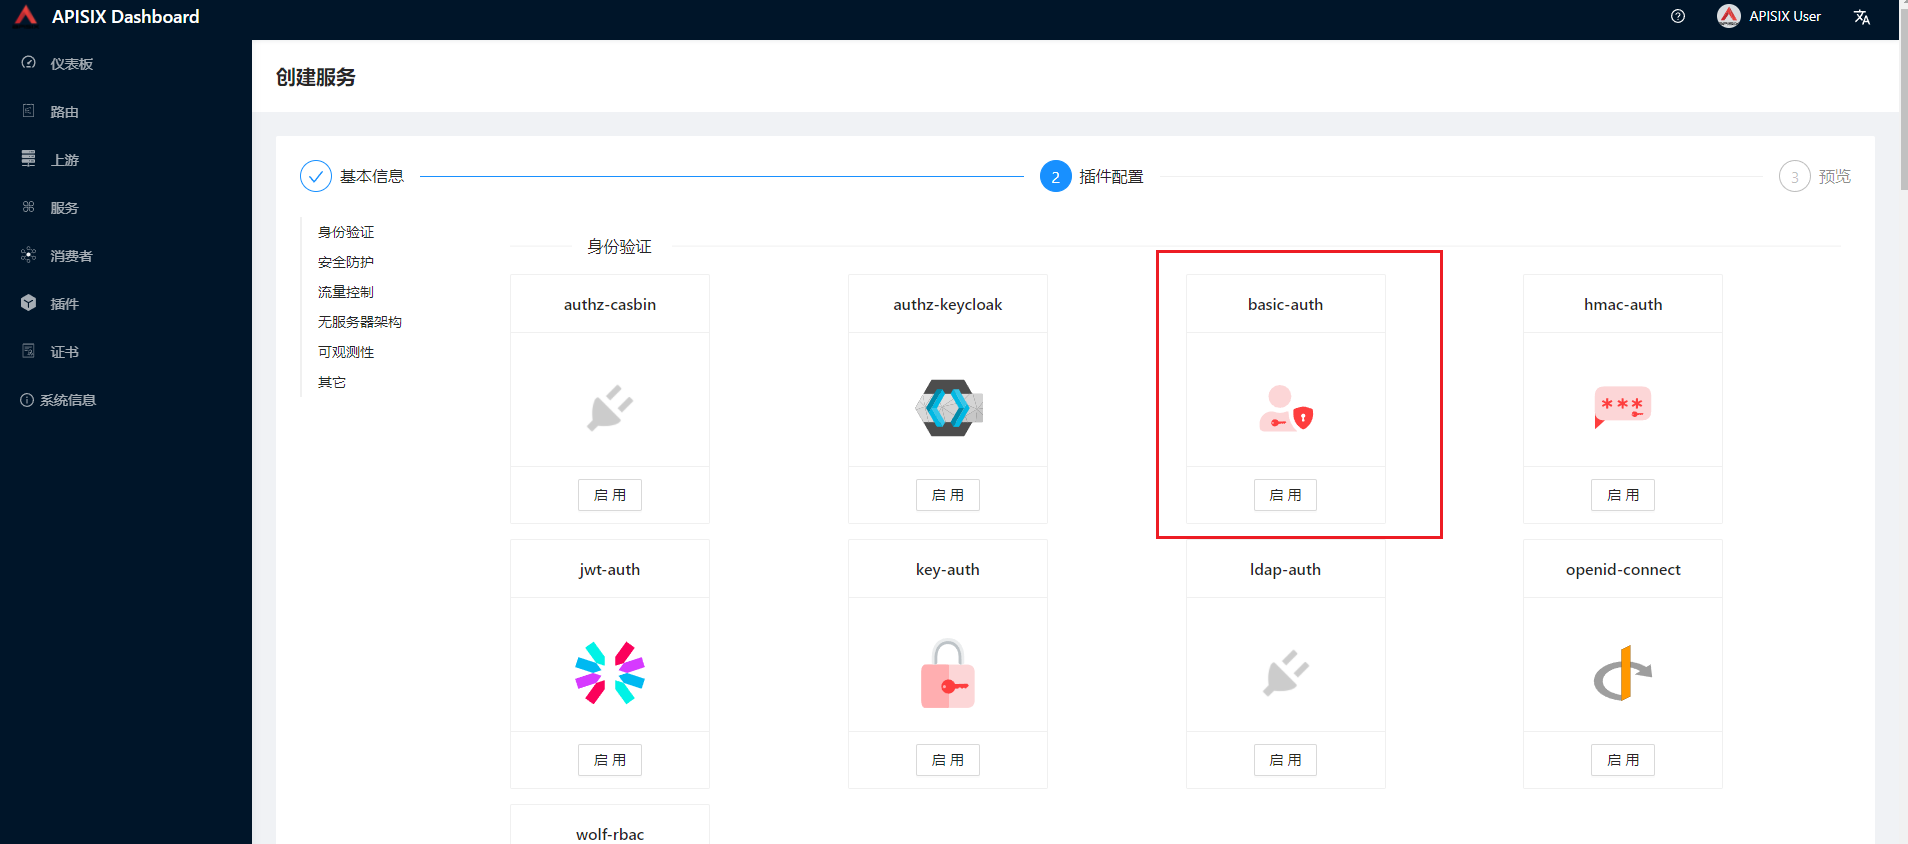
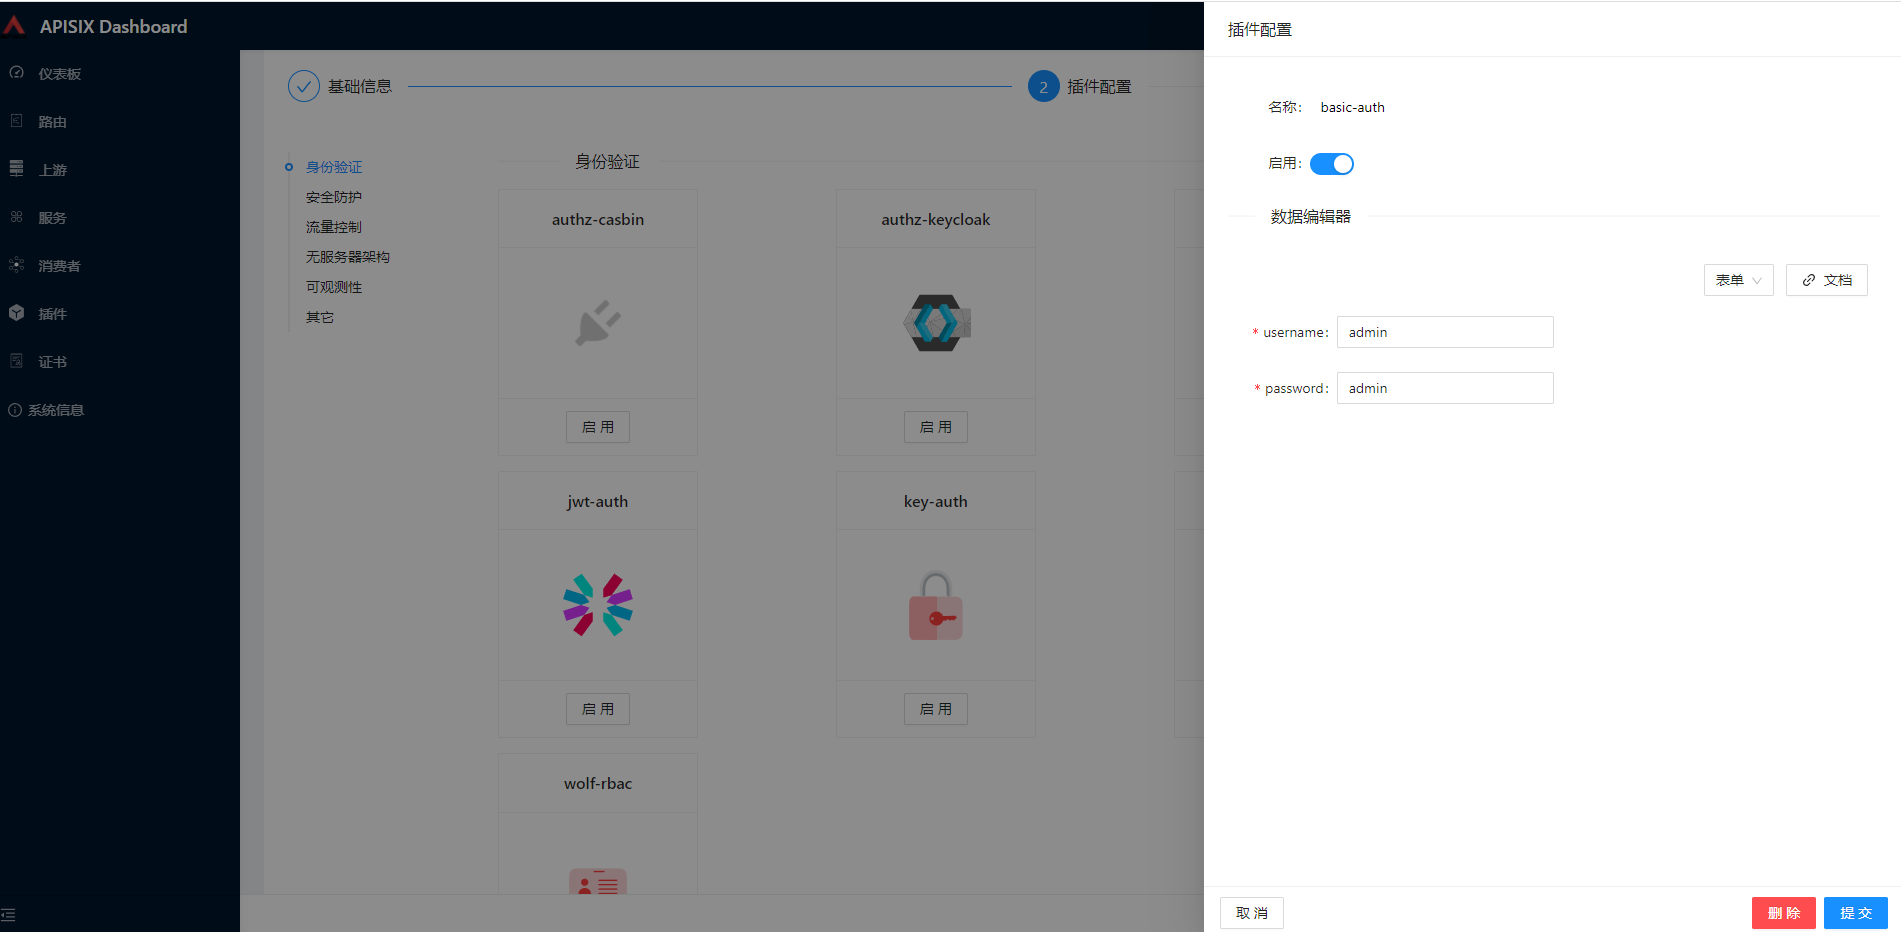
服务由路由中公共的插件配置、上游目标信息组合而成。服务与路由、上游关联,一个服务可对应一组上游节点、可被多条路由绑定。我们新建一个服务,绑定httpbin这个上游,并配置basic-auth这个插件

消费者列表
消费者是路由的消费方,形式包括开发者、最终用户、API 调用等。创建消费者时,需绑定至少一个认证类插件。

路由列表
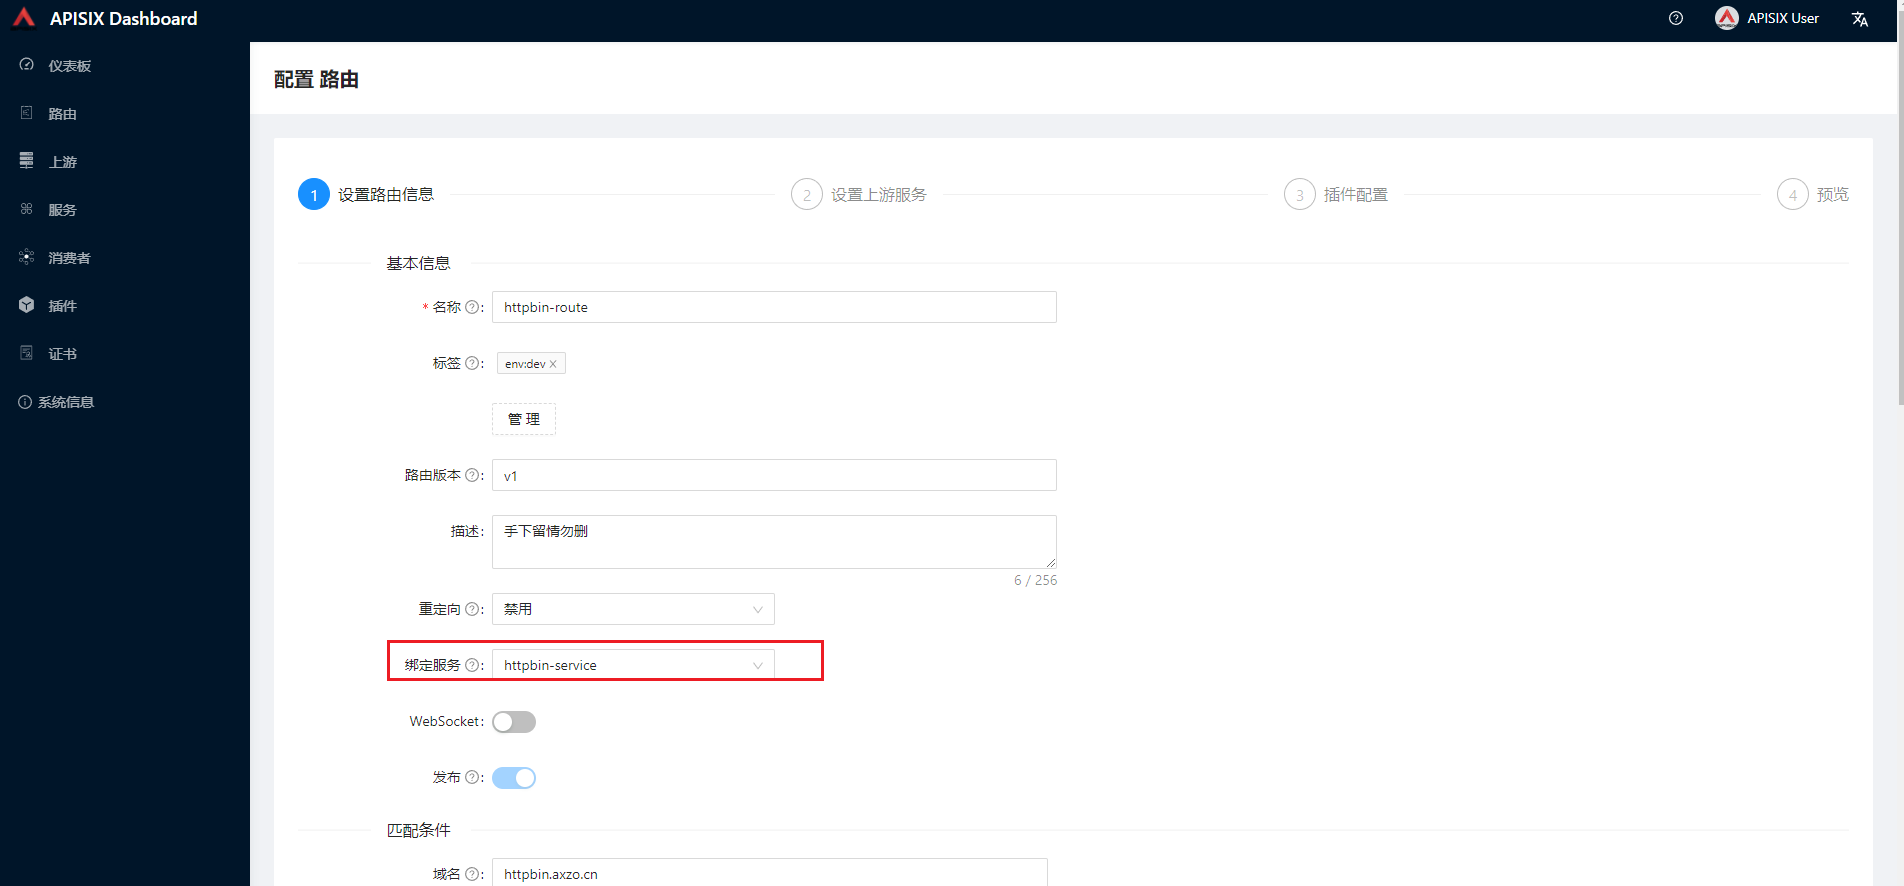
路由(Route)是请求的入口点,它定义了客户端请求与服务之间的匹配规则。路由可以与服务(Service)、上游(Upstream)关联,一个服务可对应一组路由,一个路由可以对应一个上游对象(一组后端服务节点),因此,每个匹配到路由的请求将被网关代理到路由绑定的上游服务中。
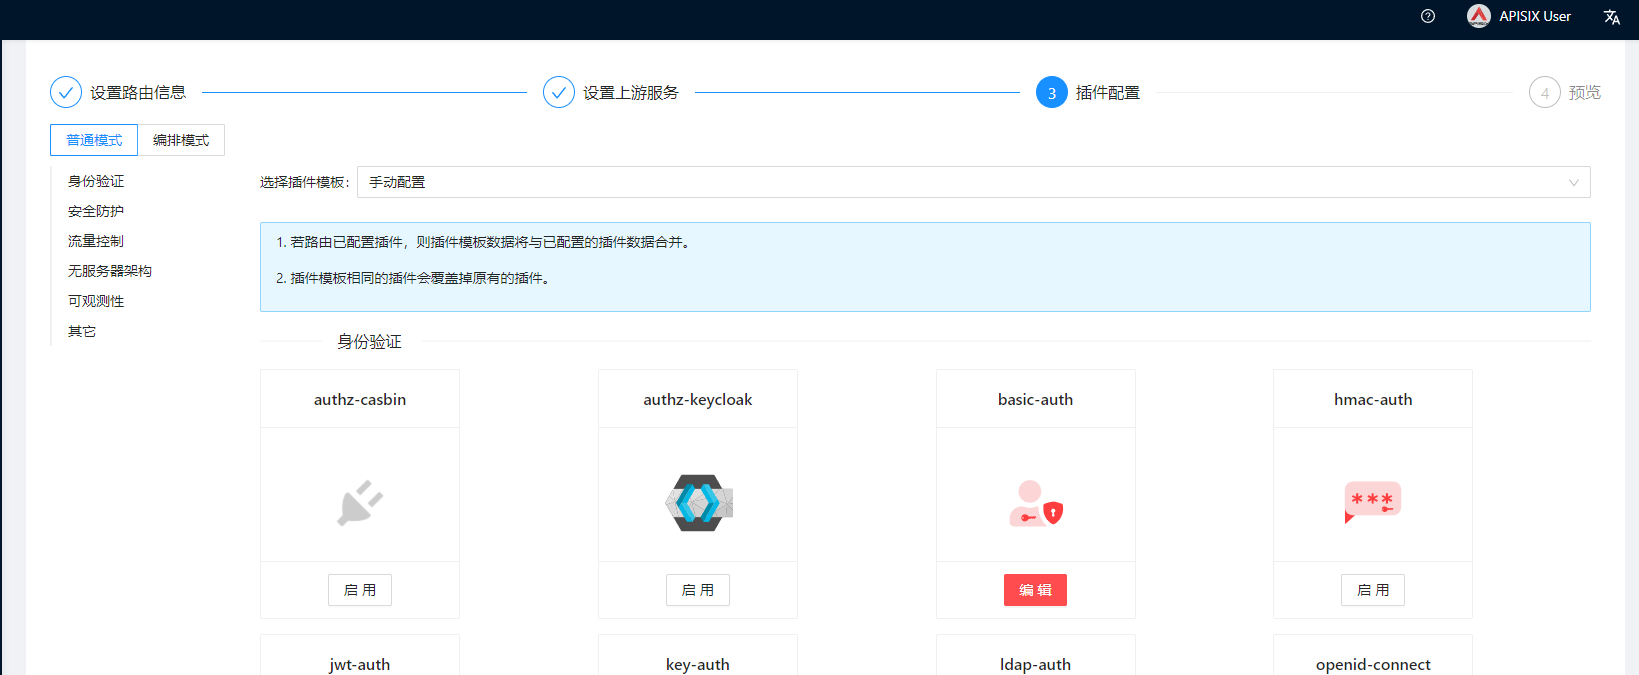

更改默认 apikey
建议通过添加
--set ingress-controller.config.apisix.adminKey=ADMIN_KEY_GENERATED_BY_YOURSEL, --set admin.credentials.admin=ADMIN_KEY_GENERATED_BY_YOURSELF来更改默key --set admin.credentials.viewer=VIEWER_KEY_GENERATED_BY_YOURSELF,注意ingress-controller.config.apisix.adminKey和admin.credentials.admin必须相同,最好不要与admin.credentials.viewer相同。helm upgrade apisix apisix/apisix -n apisix
helm history apisix -n apisix 版本历史
helm rollback apisix 1 -n apisix 回退版本挂载:
apisix-dashboard-schema schema.json
优化:
extraVolumes
extraVolumeMounts
apisix:
 real_ip_header: "X-Forwarded-For"  客户端ip
       allow_admin:                  # http://nginx.org/en/docs/http/ngx_http_access_module.html#allow
        - 127.0.0.1/24
        - 0.0.0.0/0
      #   - "::/64"
      port_admin: 9180
      extra_lua_path: "/usr/local/apisix/extra/?.lua"  自定义脚本持久化目录
挂载持久化目录:
      volumes:
      - configMap:
          defaultMode: 420
          name: apisix
        name: apisix-config
      - name: apisix-plugins
        persistentVolumeClaim:
          claimName: apisix-plugins
      - hostPath:
          path: /usr/share/zoneinfo/Asia/Shanghai
          type: ""
        name: tz-config
---
        volumeMounts:
        - mountPath: /usr/local/apisix/conf/config.yaml
          name: apisix-config
          subPath: config.yaml
        - mountPath: /usr/local/apisix/extra
          name: apisix-plugins
        - mountPath: /etc/localtime
          name: tz-config

