
ELK日志平台索引备份,迁移及恢复 ELK7.5.1集群部署

从6.7或更早版本直接升级到7.5.1需要 完全重启群集。
创建快照备份索引.kibana
https://www.elastic.co/guide/en/elasticsearch/reference/current/modules-snapshots.html
1、修改elasticsearch配置文件必须path.repo 在所有主节点和数据节点上的设置中。
vim elasticsearch.yml
path.repo: ["/opt/my_backup"] //设置仓库路径
2、设置仓库
curl  -H "Content-Type: application/json"  -XPUT  http://192.168.0.156:9200/_snapshot/my_backup -d '
{
    "type": "fs",
    "settings": {
        "location": "/opt/my_backup",
"compress": true
    }
}'
3、查看仓库
curl -GET http://192.168.0.156:9200/_snapshot
4、备份数据
curl -XPUT http://192.168.0.156:9200/_snapshot/my_backup/snapshot_20200108
执行上面的命令会快照ealsticsearch上所有的索引。 如果需要快照指定的.kibana索引:
curl -XPUT http://192.168.0.156:9200/_snapshot/my_backup/snapshot_20200108 -d '
{
    "indices": ".kibana"
}'
5、查看备份
curl -XGET http://192.168.0.156:9200/_snapshot/my_backup/snapshot_20200108
_snapshot/my_backup/_all 查看全部
6、删除备份
curl -XDELETE http://192.168.0.156:9200/_snapshot/my_backup/snapshot_20200108
7、恢复备份
curl -XPOST http://192.168.0.156:9200/_snapshot/my_backup/snapshot_20200108/_restore
ELK集群部署
Elasticsearch集群部署架构
| 节点 | CPU/内存 | 节点角色 |
|---|---|---|
| ES-cluster-192.168.0.114 | 8*32 | master Kibana |
| ES-cluster-192-168-0-98 | 8*32 | master |
| ES-cluster-192-168-0-156 | 8*32 | master |
初始化环境
如果有多个java版本需要指定JAVA_HOME
export JAVA_HOME=/data/elk/elasticsearch-7.5.1/jdk
export PATH=$JAVA_HOME/bin:$PATH
创建用户
groupadd elk
useradd elk -g elk
echo '123456' | passwd --stdin elk
修改文件描述符
vi /etc/security/limits.conf
* soft  nofile 655360
* hard  nofile 655360
* soft  nproc  4096
* hard  nproc  4096
elk soft memlock unlimited
elk hard memlock unlimited
ulimit -n
echo 'vm.max_map_count=655360' >> /etc/sysctl.conf
sysctl -p
elasticsearch7.0配置文件详解
cluster.name: ES-Cluster
#ES集群名称,同一个集群内的所有节点集群名称必须保持一致

node.name: ES-cluster-192.168.0.114
#ES集群内的节点名称,同一个集群内的节点名称要具备唯一性

node.master: true
#允许节点是否可以成为一个master节点,ES是默认集群中的第一台机器成为master,如果这台机器停止就会重新选举

node.data: false
#允许该节点存储索引数据(默认开启)
#关于Elasticsearch节点的角色功能详解,请看:

path.data: /data/elk_data/data
#ES是搜索引擎,会创建文档,建立索引,此路径是索引的存放目录,如果我们的日志数据较为庞大,那么索引所占用的磁盘空间也是不可小觑的
#这个路径建议是专门的存储系统,如果不是存储系统,最好也要有冗余能力的磁盘,此目录还要对elasticsearch的运行用户有写入权限
#path可以指定多个存储位置,分散存储,有助于性能提升,以至于怎么分散存储请看详解

path.logs: /data/elk_data/logs
#elasticsearch专门的日志存储位置,生产环境中建议elasticsearch配置文件与elasticsearch日志分开存储

bootstrap.memory_lock: true
#在ES运行起来后锁定ES所能使用的堆内存大小,锁定内存大小一般为可用内存的一半左右;锁定内存后就不会使用交换分区
#如果不打开此项,当系统物理内存空间不足,ES将使用交换分区,ES如果使用交换分区,那么ES的性能将会变得很差

network.host: 0.0.0.0
#es绑定地址,支持IPv4及IPv6,默认绑定127.0.0.1;es的HTTP端口和集群通信端口就会监听在此地址上

network.tcp.no_delay: true
#是否启用tcp无延迟,true为启用tcp不延迟,默认为false启用tcp延迟

network.tcp.keep_alive: true
#是否启用TCP保持活动状态,默认为true

network.tcp.reuse_address: true
#是否应该重复使用地址。默认true,在Windows机器上默认为false

network.tcp.send_buffer_size: 128mb
#tcp发送缓冲区大小,默认不设置

network.tcp.receive_buffer_size: 128mb
#tcp接收缓冲区大小,默认不设置

transport.tcp.port: 9300
#设置集群节点通信的TCP端口,默认就是9300

transport.tcp.compress: true
#设置是否压缩TCP传输时的数据,默认为false

http.max_content_length: 200mb
#设置http请求内容的最大容量,默认是100mb

http.cors.enabled: true
#是否开启跨域访问

http.cors.allow-origin: "*"
#开启跨域访问后的地址限制,*表示无限制

http.port: 9200
#定义ES对外调用的http端口,默认是9200

discovery.zen.ping.unicast.hosts: []    #在Elasticsearch7.0版本已被移除,

discovery.zen.minimum_master_nodes: 3          #在Elasticsearch7.0版本已被移除
#为了避免脑裂,集群的最少节点数量为,集群的总节点数量除以2加一

discovery.zen.fd.ping_timeout: 120s             #在Elasticsearch7.0版本已被移除
#探测超时时间,默认是3秒,我们这里填120秒是为了防止网络不好的时候ES集群发生脑裂现象

discovery.zen.fd.ping_retries: 6                #在Elasticsearch7.0版本已被移除
#探测次数,如果每次探测90秒,连续探测超过六次,则认为节点该节点已脱离集群,默认为3次

discovery.zen.fd.ping_interval: 15s             #在Elasticsearch7.0版本已被移除
#节点每隔15秒向master发送一次心跳,证明自己和master还存活,默认为1秒太频繁,

discovery.seed_hosts: ["192.168.0.114:9300", "192.168.0.98:9300","192.168.0.156:9300"]
#Elasticsearch7新增参数,群集自动发现种子节点,由discovery.zen.ping.unicast.hosts:参数改变而来

cluster.initial_master_nodes: ["192.168.0.114:9300", "192.168.0.98:9300","192.168.0.156:9300"]
#这三个节点全启动了才会选举主节点,群的总节点数量除以2加1

cluster.fault_detection.leader_check.interval: 15s
#Elasticsearch7新增参数,设置每个节点在选中的主节点的检查之间等待的时间。默认为1秒

discovery.cluster_formation_warning_timeout: 30s
#Elasticsearch7新增参数,启动后30秒内,如果集群未形成,那么将会记录一条警告信息,警告信息未master not fount开始,默认为10秒

cluster.join.timeout: 30s
#Elasticsearch7新增参数,节点发送请求加入集群后,在认为请求失败后,再次发送请求的等待时间,默认为60秒

cluster.publish.timeout: 90s
#Elasticsearch7新增参数,设置主节点等待每个集群状态完全更新后发布到所有节点的时间,默认为30秒

cluster.routing.allocation.cluster_concurrent_rebalance: 32
#集群内同时启动的数据任务个数,默认是2个

cluster.routing.allocation.node_concurrent_recoveries: 32
#添加或删除节点及负载均衡时并发恢复的线程个数,默认4个

cluster.routing.allocation.node_initial_primaries_recoveries: 32
#初始化数据恢复时,并发恢复线程的个数,默认4个
调整JVM内存
主要修改elasticsearch/jvm.options
-Xms16g    #Xms表示ES堆内存初始大小
-Xmx16g    #Xmx表示ES堆内存的最大可用空间
将 : -XX:+UseConcMarkSweepGC
改为:-XX:+UseG1GC
Master节点elasticsearch.yml部署es-cluster-192-168-0-114
# ---------------------------------- Cluster -----------------------------------
cluster.name: ES-Cluster
# ------------------------------------ Node ------------------------------------
node.name: es-cluster-192-168-0-114
node.master: true
node.data: true
# ----------------------------------- Paths ------------------------------------
path.data: /data/elk/elk_data
path.logs: /data/elk/logs
# ----------------------------------- Memory -----------------------------------
bootstrap.memory_lock: true
# ---------------------------------- Network -----------------------------------
network.host: 0.0.0.0
network.tcp.no_delay: true
network.tcp.keep_alive: true
network.tcp.reuse_address: true
network.tcp.send_buffer_size: 128mb
network.tcp.receive_buffer_size: 128mb
transport.tcp.port: 9300
transport.tcp.compress: true
http.max_content_length: 200mb
http.cors.enabled: true
http.cors.allow-origin: "*"
http.port: 9200
# --------------------------------- Discovery ----------------------------------
discovery.seed_hosts: ["192.168.0.114:9300", "192.168.0.98:9300","192.168.0.156:9300"]
cluster.initial_master_nodes: ["192.168.0.114:9300", "192.168.0.98:9300","192.168.0.156:9300"]
cluster.fault_detection.leader_check.interval: 15s
discovery.cluster_formation_warning_timeout: 30s
cluster.join.timeout: 120s
cluster.publish.timeout: 90s
cluster.routing.allocation.cluster_concurrent_rebalance: 32
cluster.routing.allocation.node_concurrent_recoveries: 32
cluster.routing.allocation.node_initial_primaries_recoveries: 32
# ---------------------------------- xpack -----------------------------------
xpack.security.enabled: true
xpack.security.transport.ssl.enabled: true
xpack.monitoring.collection.enabled: true
xpack.security.transport.ssl.verification_mode: certificate
xpack.security.transport.ssl.keystore.path: /etc/elasticsearch/certs/elastic-certificates.p12
xpack.security.transport.ssl.truststore.path: /etc/elasticsearch/certs/elastic-certificates.p12
xpack.security.http.ssl.enabled: true
xpack.security.http.ssl.keystore.path: /etc/elasticsearch/certs/elastic-certificates.p12
xpack.security.http.ssl.truststore.path: /etc/elasticsearch/certs/elastic-certificates.p12
xpack.security.http.ssl.client_authentication: none
xpack.security.http.ssl.verification_mode: certificate
# ---------------------------------- Various -----------------------------------
script.painless.regex.enabled: true
indices.fielddata.cache.size:  25%
thread_pool:
    write:
        size: 4
        queue_size: 5000
Master节点elasticsearch.yml部署es-cluster-192-168-0-98
# ---------------------------------- Cluster -----------------------------------
cluster.name: ES-Cluster
# ------------------------------------ Node ------------------------------------
node.name: es-cluster-192-168-0-98
node.master: true
node.data: true
# ----------------------------------- Paths ------------------------------------
path.data: /data/elk/elk_data
path.logs: /data/elk/logs
# ----------------------------------- Memory -----------------------------------
bootstrap.memory_lock: true
# ---------------------------------- Network -----------------------------------
network.host: 0.0.0.0
network.tcp.no_delay: true
network.tcp.keep_alive: true
network.tcp.reuse_address: true
network.tcp.send_buffer_size: 128mb
network.tcp.receive_buffer_size: 128mb
transport.tcp.port: 9300
transport.tcp.compress: true
http.max_content_length: 200mb
http.cors.enabled: true
http.cors.allow-origin: "*"
http.port: 9200
# --------------------------------- Discovery ----------------------------------
discovery.seed_hosts: ["192.168.0.114:9300", "192.168.0.98:9300","192.168.0.156:9300"]
cluster.initial_master_nodes: ["192.168.0.114:9300", "192.168.0.98:9300","192.168.0.156:9300"]
cluster.fault_detection.leader_check.interval: 15s
discovery.cluster_formation_warning_timeout: 30s
cluster.join.timeout: 120s
cluster.publish.timeout: 90s
cluster.routing.allocation.cluster_concurrent_rebalance: 32
cluster.routing.allocation.node_concurrent_recoveries: 32
cluster.routing.allocation.node_initial_primaries_recoveries: 32
# ---------------------------------- xpack -----------------------------------
xpack.security.enabled: true
xpack.security.transport.ssl.enabled: true
xpack.monitoring.collection.enabled: true
xpack.security.transport.ssl.verification_mode: certificate
xpack.security.transport.ssl.keystore.path: /etc/elasticsearch/certs/elastic-certificates.p12
xpack.security.transport.ssl.truststore.path: /etc/elasticsearch/certs/elastic-certificates.p12
xpack.security.http.ssl.enabled: true
xpack.security.http.ssl.keystore.path: /etc/elasticsearch/certs/elastic-certificates.p12
xpack.security.http.ssl.truststore.path: /etc/elasticsearch/certs/elastic-certificates.p12
xpack.security.http.ssl.client_authentication: none
xpack.security.http.ssl.verification_mode: certificate
# ---------------------------------- Various -----------------------------------
script.painless.regex.enabled: true
indices.fielddata.cache.size:  25%
thread_pool:
    write:
        size: 4
        queue_size: 5000
Master节点elasticsearch.yml部署es-cluster-192-168-0-156
# ---------------------------------- Cluster -----------------------------------
cluster.name: ES-Cluster
# ------------------------------------ Node ------------------------------------
node.name: es-cluster-192-168-0-156
node.master: true
node.data: true
# ----------------------------------- Paths ------------------------------------
path.data: /data/elk/elk_data
path.logs: /data/elk/logs
# ----------------------------------- Memory -----------------------------------
bootstrap.memory_lock: true
# ---------------------------------- Network -----------------------------------
network.host: 0.0.0.0
network.tcp.no_delay: true
network.tcp.keep_alive: true
network.tcp.reuse_address: true
network.tcp.send_buffer_size: 128mb
network.tcp.receive_buffer_size: 128mb
transport.tcp.port: 9300
transport.tcp.compress: true
http.max_content_length: 200mb
http.cors.enabled: true
http.cors.allow-origin: "*"
http.port: 9200
# --------------------------------- Discovery ----------------------------------
discovery.seed_hosts: ["192.168.0.114:9300", "192.168.0.98:9300","192.168.0.156:9300"]
cluster.initial_master_nodes: ["192.168.0.114:9300", "192.168.0.98:9300","192.168.0.156:9300"]
cluster.fault_detection.leader_check.interval: 15s
discovery.cluster_formation_warning_timeout: 30s
cluster.join.timeout: 120s
cluster.publish.timeout: 90s
cluster.routing.allocation.cluster_concurrent_rebalance: 32
cluster.routing.allocation.node_concurrent_recoveries: 32
cluster.routing.allocation.node_initial_primaries_recoveries: 32
# ---------------------------------- xpack -----------------------------------
xpack.security.enabled: true
xpack.security.transport.ssl.enabled: true
xpack.monitoring.collection.enabled: true
xpack.security.transport.ssl.verification_mode: certificate
xpack.security.transport.ssl.keystore.path: /etc/elasticsearch/certs/elastic-certificates.p12
xpack.security.transport.ssl.truststore.path: /etc/elasticsearch/certs/elastic-certificates.p12
xpack.security.http.ssl.enabled: true
xpack.security.http.ssl.keystore.path: /etc/elasticsearch/certs/elastic-certificates.p12
xpack.security.http.ssl.truststore.path: /etc/elasticsearch/certs/elastic-certificates.p12
xpack.security.http.ssl.client_authentication: none
xpack.security.http.ssl.verification_mode: certificate
# ---------------------------------- Various -----------------------------------
script.painless.regex.enabled: true
indices.fielddata.cache.size:  25%
thread_pool:
    write:
        size: 4
        queue_size: 5000
安装Kibana
1、通过elastic-stack-ca.p12 CA给kibana颁发证书
bin/elasticsearch-certutil cert --ca \
elastic-stack-ca.p12 \
-name "CN=kibana,OU=elk,DC=mydomain,DC=com"
ENTER
kibana.p12
ENTER
ENTER
转换成其他格式 不使用https可以不用
openssl pkcs12 -in kibana.p12 -nocerts -nodes > kibana.key
openssl pkcs12 -in kibana.p12 -clcerts -nokeys  > kibana.cer
openssl pkcs12 -in kibana.p12 -cacerts -nokeys -chain > kibana-ca.cer
mkdir /etc/kibana/certs
cp kibana* /etc/kibana/certs/
chown kibana:kibana -R /etc/kibana/certs/
vim config/kibana.yml
  server.port: 5600
  server.host: "192.168.0.98"
  elasticsearch.hosts: ["https://192.168.0.98:9200","https://192.168.0.98:9200","https://192.168.0.156:9200"]
  xpack.security.enabled: true
  elasticsearch.ssl.certificateAuthorities: /etc/kibana/certs/kibana-ca.cer
  elasticsearch.ssl.verificationMode: certificate
  server.ssl.enabled: true
  server.ssl.key: /etc/kibana/certs/kibana.key
  server.ssl.certificate: /etc/kibana/certs/kibana.cer
  server.ssl.certificateAuthorities: /etc/kibana/certs/kibana-ca.ce
  elasticsearch.username: "kibana"
  elasticsearch.password: "xxxxx"
  #elasticsearch.ssl.verificationMode: none
  elasticsearch.requestTimeout: 90000
  i18n.locale: "zh-CN"
如果你不想将用户ID和密码放在kibana.yml文件中明文配置,可以将它们存储在密钥库中。运行以下命令以创建Kibana密钥库并添加配置:
./bin/kibana-keystore create
./bin/kibana-keystore add elasticsearch.username
./bin/kibana-keystore add elasticsearch.password
启用X-pack安全配置TLS和身份验证
生成CA证书
开启安全模块后,节点间通讯需要配置TLS 生成CA证书 bin/elasticsearch-certutil ca,将产生新文件 elastic-stack-ca.p12 为集群中的每个节点生成证书和私钥 bin/elasticsearch-certutil cert –ca elastic-stack-ca.p12,将产生新文件 elastic-certificates.p12默认情况下 elasticsearch-certutil 生成没有主机名信息的证书,这意味着你可以将证书用于集群中的每个节点,另外要关闭主机名验证。 将 elastic-certificates.p12 文件复制到每个节点上Elasticsearch配置目录中
mkdir /etc/elasticsearch/certs/
bin/elasticsearch-certutil ca --days  2920
bin/elasticsearch-certutil cert --days 2920 --ca elastic-stack-ca.p12
cp elastic-certificates.p12 /etc/elasticsearch/certs/
chown -R elk:elk /etc/elasticsearch/certs
拷贝证书到所有节点下并赋予相关的权限 elasticsearch.yml末尾增加xpack相关配置
xpack.security.enabled: true
xpack.security.transport.ssl.enabled: true
xpack.security.transport.ssl.verification_mode: certificate
xpack.security.transport.ssl.keystore.path: certs/elastic-certificates.p12
xpack.security.transport.ssl.truststore.path: certs/elastic-certificates.p12
xpack.security.http.ssl.enabled: true
xpack.security.http.ssl.keystore.path: certs/elastic-certificates.p12
xpack.security.http.ssl.truststore.path: certs/elastic-certificates.p12
xpack.security.http.ssl.client_authentication: none
设置内置用户密码
启动集群初始化elastic,apm_system,kibana,logstash_system,beats_system,remote_monitoring_user用户的密码,请牢记! bin/elasticsearch-setup-passwords auto 各用户生成随机密码。 bin/elasticsearch-setup-passwords interactive 手动定义密码
bin/elasticsearch-setup-passwords interactive
-----------------------

openssl pkcs12 -in ca.p12 -clcerts -nokeys -chain -out ca.pem //将p12证书转换为PEM格式
Logstash部署
http://idcsec.com/wp-admin/post.php?post=165&action=edit
kfaka部署
kubernetes部署fluent-bit
修改密码命令如下
ES 7中集群分片限制的默认值为每节点最大1000个,可以通过cluster.max_shards_per_node进行设置,例如:
url -X PUT "localhost:9200/_cluster/settings?pretty" -H 'Content-Type: application/json' -d'
{
  "persistent": {
    "cluster.max_shards_per_node": 2000
  }
}
'
7.x配置默认分片 index.number_of_shards: 7.X不支持 需要在template里面修改
{
  "order": 0,
  "version": 60001,
  "index_patterns": [
    "logstash-*"
  ],
  "settings": {
    "index": {
      "max_result_window": "2147483647",
      "number_of_shards": "5",    #在这里设置
      "refresh_interval": "30s"
    }
  },
  "mappings": {},
  "aliases": {}
}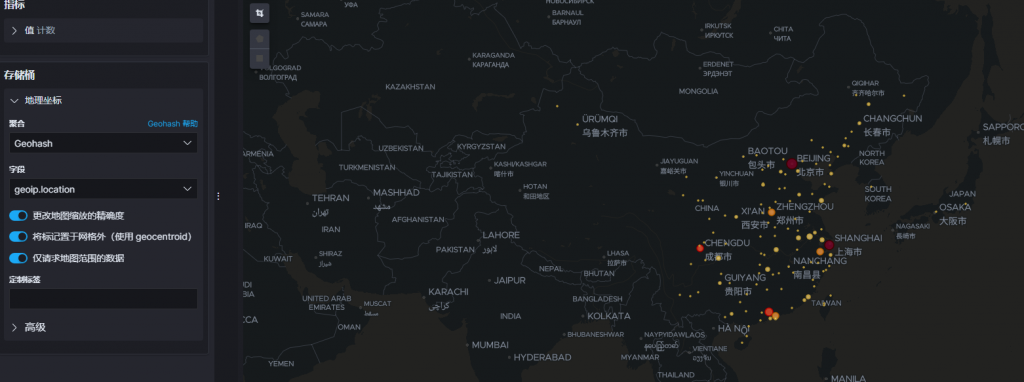
# 修改 location 字段类型
geo-point
{
  "order": 0,
  "index_patterns": [
    "logstash-*"
  ],
  "settings": {
    "index": {
      "number_of_shards": "5",
      "refresh_interval": "30s"
    }
  },
  "mappings": {
    "properties": {
        "geoip": {
           "properties": {
              "location": {
                 "ignore_malformed": "true",
                 "type": "geo_point"
                }
           }
        }
    }
  },
  "aliases": {}
}
PUT _template/logstash
{
  "template": "logstash-*",
  "mappings": {
    "fluentd": {
      "properties" : {
        "location": { "type": "geo_point"}
      }
    }
  }
}
